


If you want to play Palworld with friends, you’ll need to set up your own hosting server. You can use your personal computer, but this often doesn’t provide the best experience for players. Instead, you can use a dedicated server with decent hardware, which offers a more stable and fluid experience for games like Palworld.
The good news is you can move your existing Palworld save to a dedicated server. While this won’t preserve all the data, it will enable you to access the world you’ve been playing in. With a little preparation and the right setup, you won’t lose your hard-earned items and pals, but you’ll probably need to create a new character.
In this article, we’ll talk about why it makes sense to use a Palworld dedicated server. We’ll also touch on what data you might lose during the migration process. Then, we’ll show you how to move to a Palworld dedicated server. Let’s get to it!
Why You Should Transfer Your Save Files to a Palworld Server
When you set up a Palworld dedicated server, you have two options. You can create a new world or transfer your existing world files from another save.
Palworld stores all of the world information locally. That means you can take existing world files, move them to another computer (with Palworld installed), and pick up the game from where you left off.
While moving files from one server to another is relatively straightforward, the way in which Palworld stores data means some information can be lost in the process. In most cases, you’ll lose your player character data when transferring save files from a computer to a server.
If you’re transferring a co-op world save, other players might lose their characters too. Typically though, this should be contained to the main player character. Plus, there are ways you can somewhat get around this problem, which we’ll discuss in the next section.
Despite these limitations, using a dedicated server provides a better experience for online co-op games compared to local computers. That’s because the servers are optimized for the games you play. And with uptime guarantees, premium servers can be more reliable.
Better yet, with a dedicated solution, you’re not in charge of server maintenance. The hosting service takes care of that for you, and you get access to support if you need it.
There are lots of web hosts that offer dedicated servers for popular games. NameHero provides a selection of gaming servers, including dedicated Palworld plans:
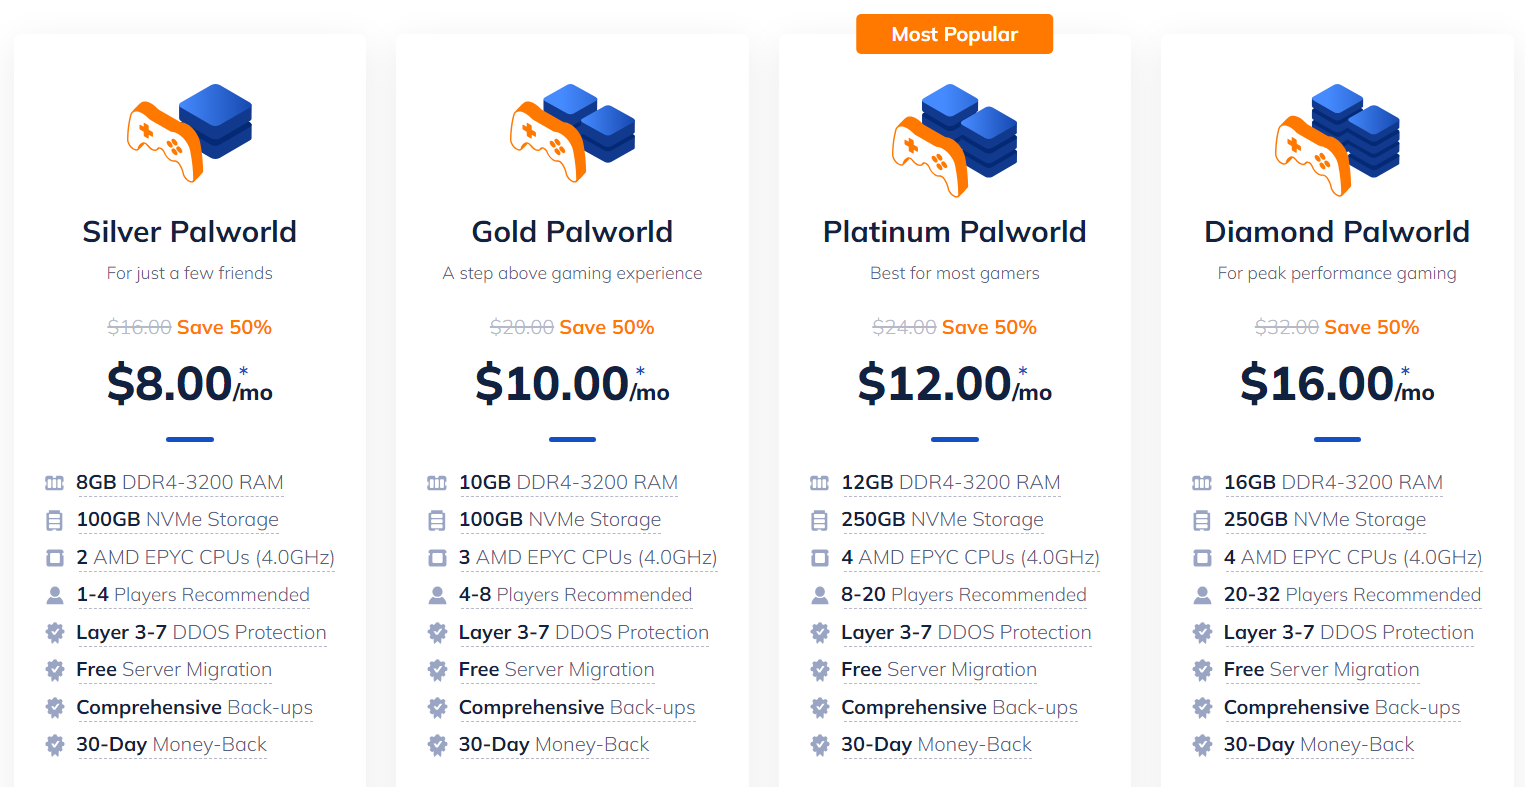
These plans can support up to 32 players, depending on the game’s configuration. Additionally, these cost-effective packages promise great performance and a 99.99 percent uptime guarantee.
What’s more, NameHero installs Palworld automatically, so your server is ready for connection right after checkout. And, the service includes game updates, server maintenance, and dedicated support.
What Happens to Player Data When Migrating a Palworld Save?
When you transfer your save data to a Palworld dedicated server, you’re copying the world, pals, buildings, and other items inside of it. But, as we mentioned, due to the way that Palworld stores world information, moving save files from one computer to another means you’ll lose character data in the process.
In most cases, this only applies to the player or host character. Plus, there are ways around this issue. One thing you can do to avoid starting from scratch is store all your player items in chests. These chests will remain in the world, even though your character disappears.
Once you transfer the world to the Palworld server, you can create a new character and grab the items you want from the storage chests. You’ll still need to level up the character again, but this shouldn’t be that difficult since you’re already familiar with the world.
Note that you’ll also want to move your save to a Palworld dedicated server that uses the same Operating System (OS) as your local device. That’s because moving saves between systems (such as from Windows to Linux) results in all character data being lost – for other players.
How to Move Palworld to Dedicated Server (3 Steps)
Now, let’s go over how you can move Palworld to a dedicated server in three steps!
Step 1: Locate Your Palworld World Data
When you create a new world in Palworld, that information is stored locally in multiple files and folders. These include the following:
- Backup (folder)
- Players (folder)
- Level.sav
- LevelMeta.sav
- WorldOpton.sav
This is important because the first step is to locate your Palword data.
To locate these files, open Palworld and click on Start Game. This will open the world selection screen, where you’ll see all the current games stored locally.
Select the game you want to transfer to the dedicated server. Then, click on the folder icon in the bottom left corner of the screen:
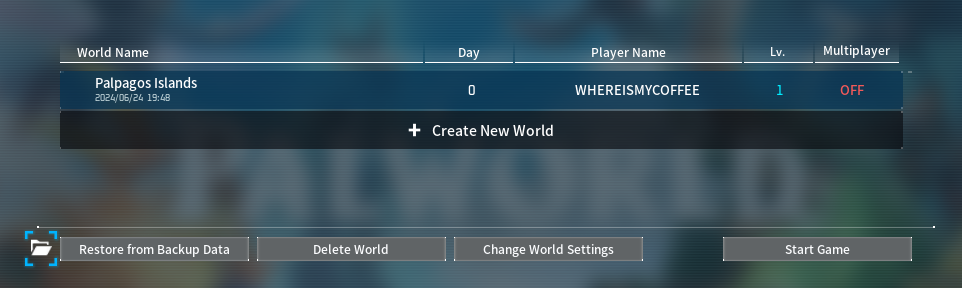
Doing this will open the folder where Palworld stores that game’s data. For now, keep this window open. You’ll need to return to it once you connect to the dedicated server.
Step 2: Upload the Files to the Palworld Dedicated Server
There are two ways to upload files to the new machine. You can use the Secure File Transfer Protocol (SFTP) to connect to the server. Or, you can use a file manager through the hosting control panel.
All NameHero’s Palworld dedicated servers include an advanced gaming panel. This panel enables you to monitor the Palworld server and manage its files. For this tutorial, we’ll use the file manager so you don’t need to download an FTP client.
Log into your NameHero account and check out your active services. Click on the Palworld server to open an overview menu. In this screen, you’ll find connection information for the server – like the server address, port, and SFTP password.
Remember how to get to this screen since you’ll need the connection information to play the game:
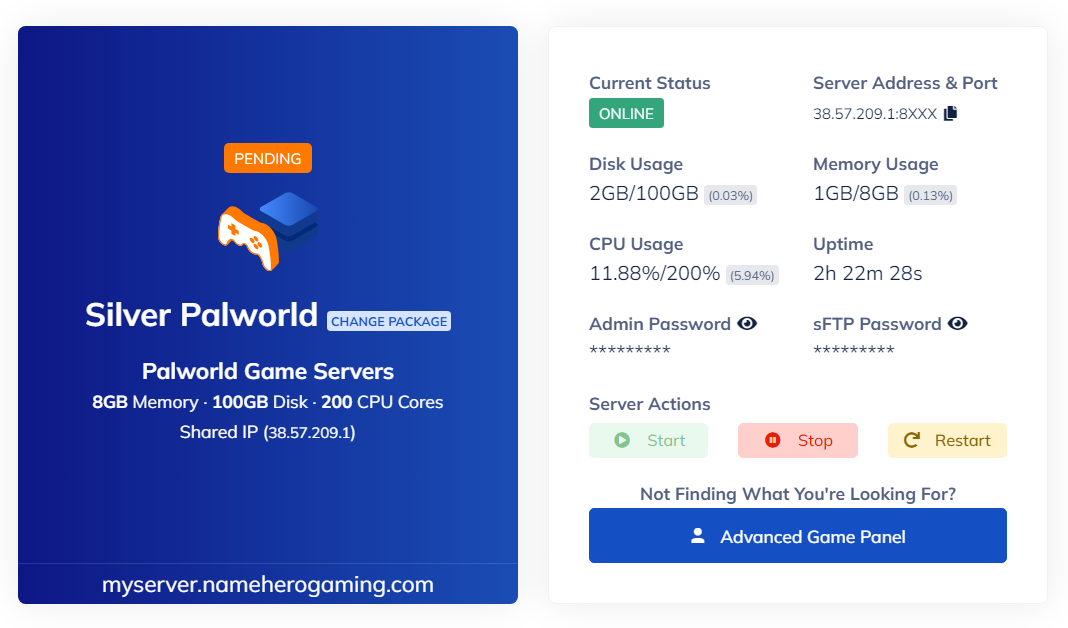
Click on Advanced Game Panel to open the panel we discussed a minute ago. At the top of the screen, select the menu option that says Files:
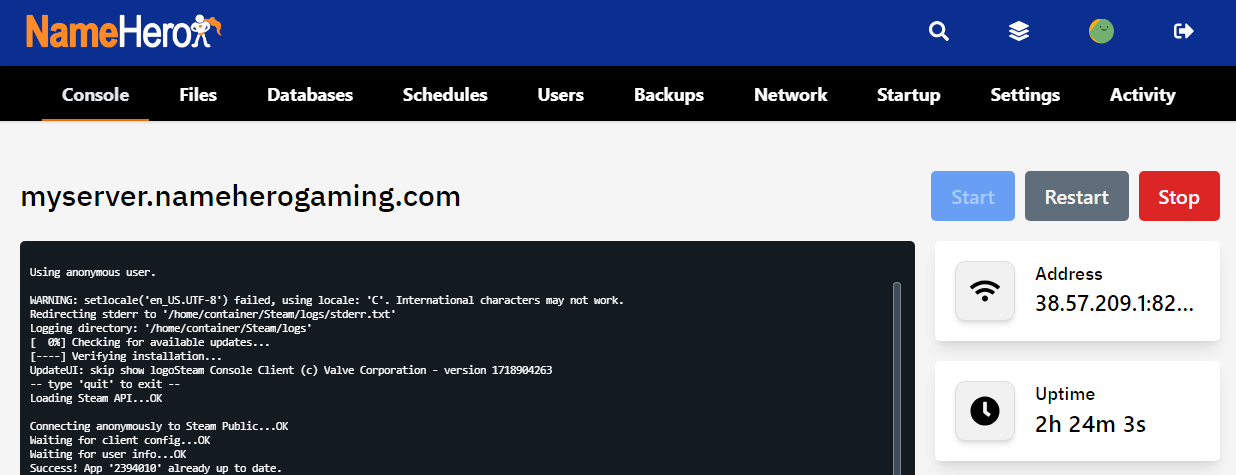
Once the file manager opens, locate the Pal folder. Open the folder and navigate to the following location:
/home/container/Pal/Saved/SaveGames/0
You should find a single folder inside the “0” directory. That folder’s name should be a string of numbers and letters. Open that folder and delete the subdirectory and other files inside:
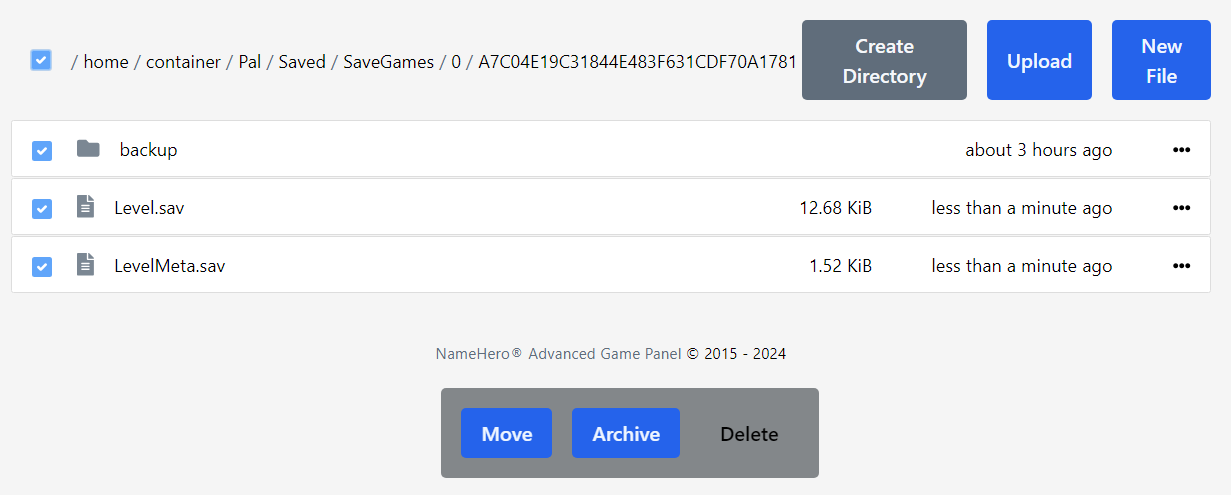
Now, click on the Upload button in the top right corner of the screen. This will open a file selector.
Select the files you located during step one and confirm that you want to upload them. When you’re done, the folder should look like this:
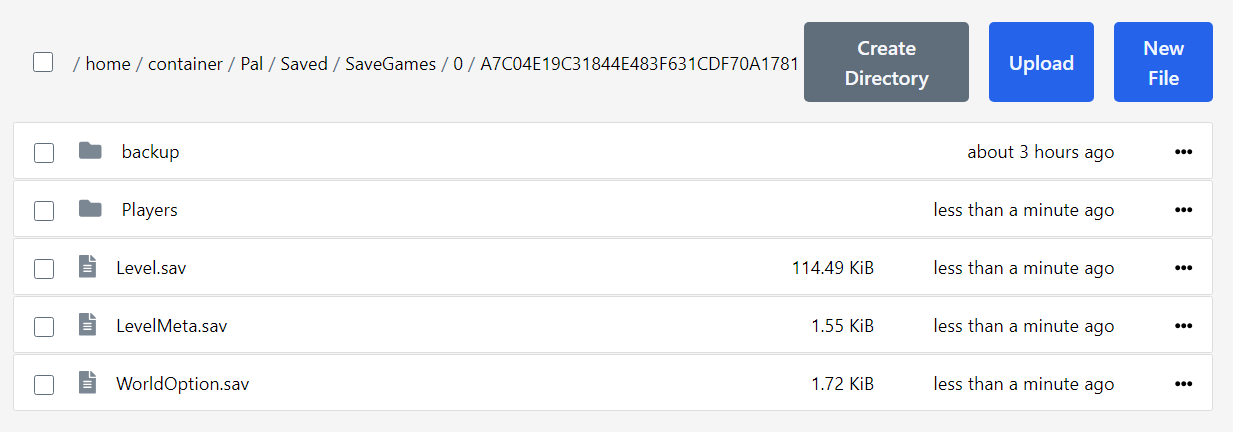
At this point, your world is ready to go on the dedicated server. All that’s left to do is test it.
Step 3: Test Your Palworld Save on the Dedicated Server
To test if your Palworld save is working correctly, open the game and click on Join Multiplayer Game. In the next screen, look for the field at the bottom that says Enter password:
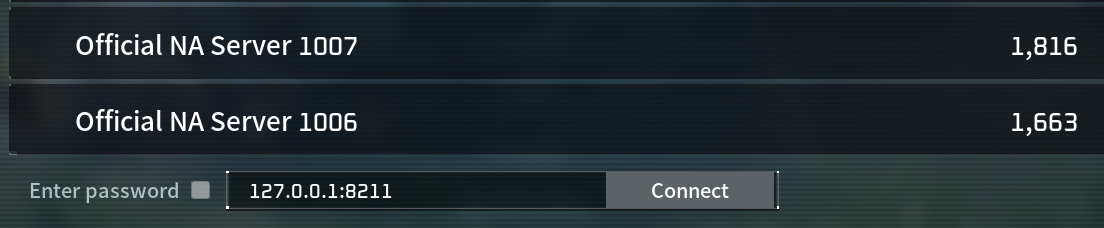
Disable the Enter password check since NameHero’s Palworld servers don’t have passwords out of the box (although you can set one up). Copy the IP address and port for the server, which we showed you how to find from the hosting control panel.
Then, click on Connect and Palworld will do the rest. If the server is up, the game will connect to it and you’ll be able to join your existing world on a brand new server. Once inside, you may want a reminder on how to fast travel or how to find the fastest flying mount if you’re feeling adventurous.
Conclusion
If you like playing Palworld with friends, paying for a dedicated server can be worth it. As the host, you’ll need to create a new character to return to the world. But, you can retain all your existing items and pals from your former Palworld save. What’s more, other players shouldn’t lose access to their characters, as this issue typically only affects the host.
With that in mind, here are the steps to move Palworld to a dedicated server:
- Locate your Palworld world data.
- Upload the files to the Palworld dedicated server.
- Test your Palworld save on the dedicated server.
Come Hang Or Give NameHero Game Servers A Try!
NameHero specializes in delivering some of the very best in gaming server tech without breaking the bank. DDR4-3200 RAM, NVMe storage, AMD EPYC CPU’s and more come with every Palworld server!
Already have a server? That’s okay, come hang out with us on Discord!
Leave a Reply