


No matter what type of website you run, images make your content visually appealing and engaging. However, if you use the wrong WordPress image sizes, you can disrupt the user experience (UX) and slow down your website.
That’s why it’s important to learn how to display and optimize your photos effectively. While your theme offers default WordPress image sizes, you can insert custom image sizes that suit your requirements. You could also compress photos to speed up your WordPress site.
In this post, we’ll provide an in-depth guide to WordPress image sizes. We’ll also show you how to resize, compress, and optimize images in WordPress. Let’s get to it!
WordPress Default Image Sizes (And How to Adjust Them)
Many people believe WordPress images are just about aesthetics. However, images impact site speed, the user experience (UX), and search engine rankings.
When you upload images to WordPress, it automatically generates the following variations:
- Thumbnail size: 150 x 150 pixels
- Medium size image: 300 x 300 pixels max
- Large images: 1024 x 1024 pixels max
- Full size image: The original image
This allows browsers to load the most suitable image size, based on factors like the visitor’s device.
For instance, WordPress may load large images if someone requests your page from a desktop. However, it might select a smaller variation if someone is browsing on a mobile phone.
This feature also allows youto choose the best image sizes, depending on where you want to display the photo. For example, featured images usually appear as thumbnails, but for blog post images, it makes sense to use large or full-size photos.
If you’re constantly cropping the images you upload, you might prefer to adjust the default WordPress image sizes. To do so, head to Settings > Media in the WordPress dashboard:
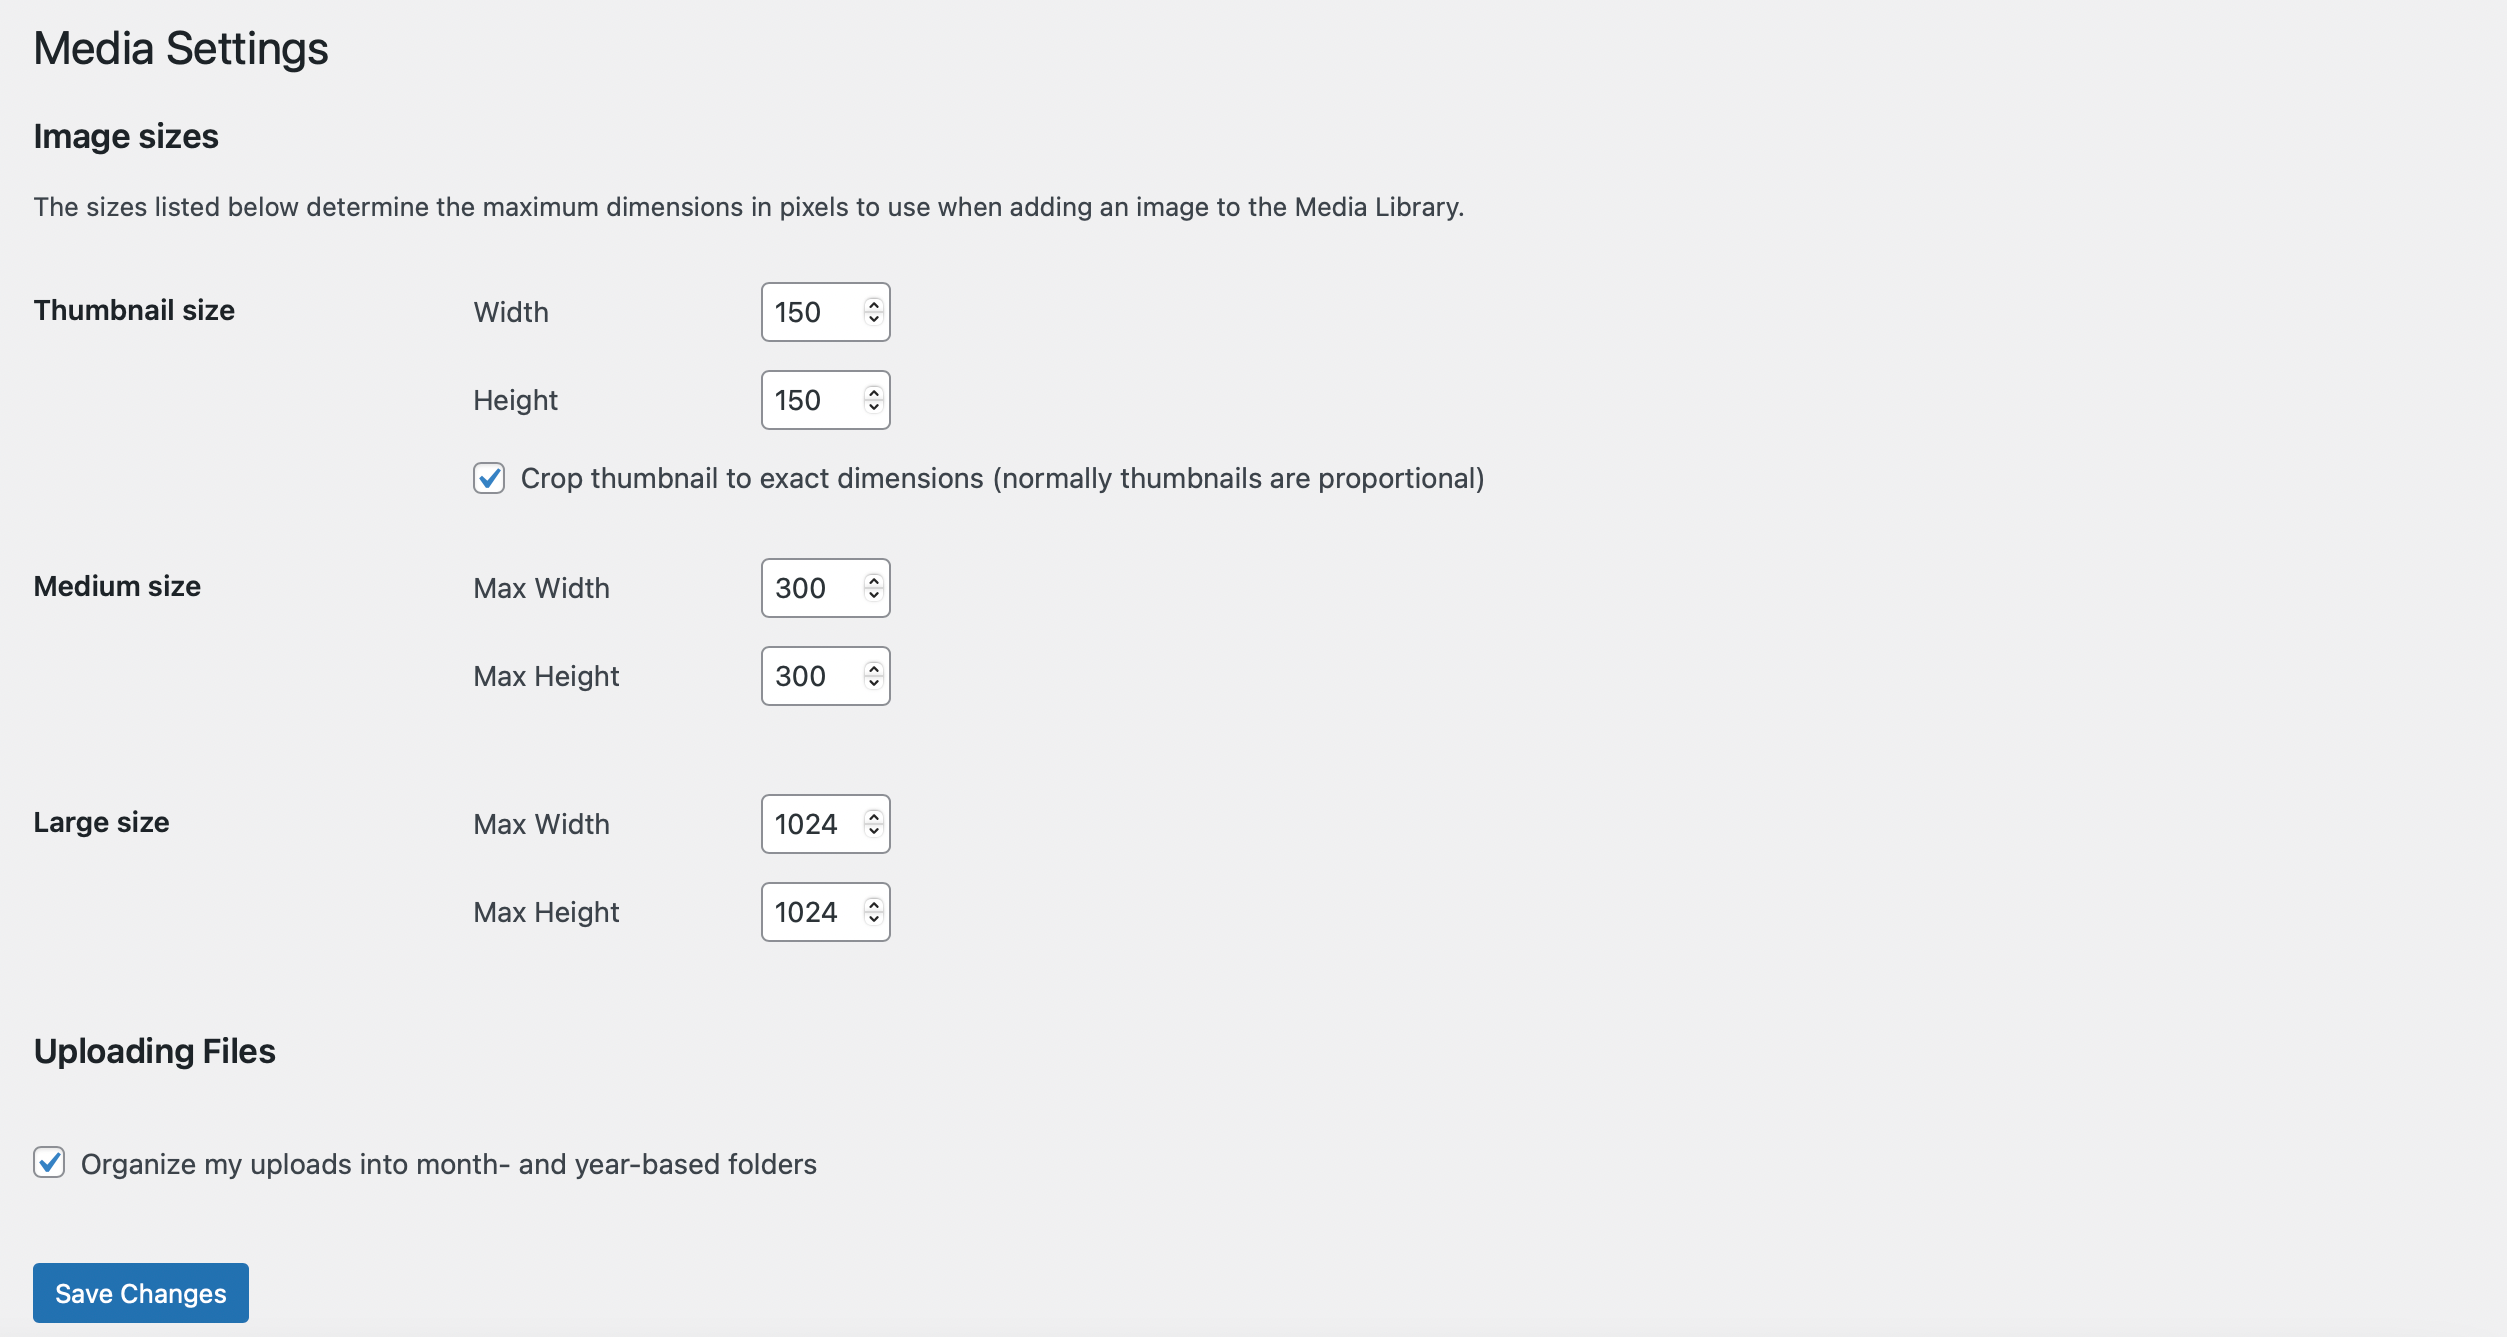
Here, you can see the dimensions for the available image sizes. Simply enter custom image dimensions in the Height and Width boxes and click on Save Changes.
You can also swap the default image sizes that WordPress supplies in certain locations like blog posts. In this instance, highlight the image on the page and find the Resolution option in the block settings:
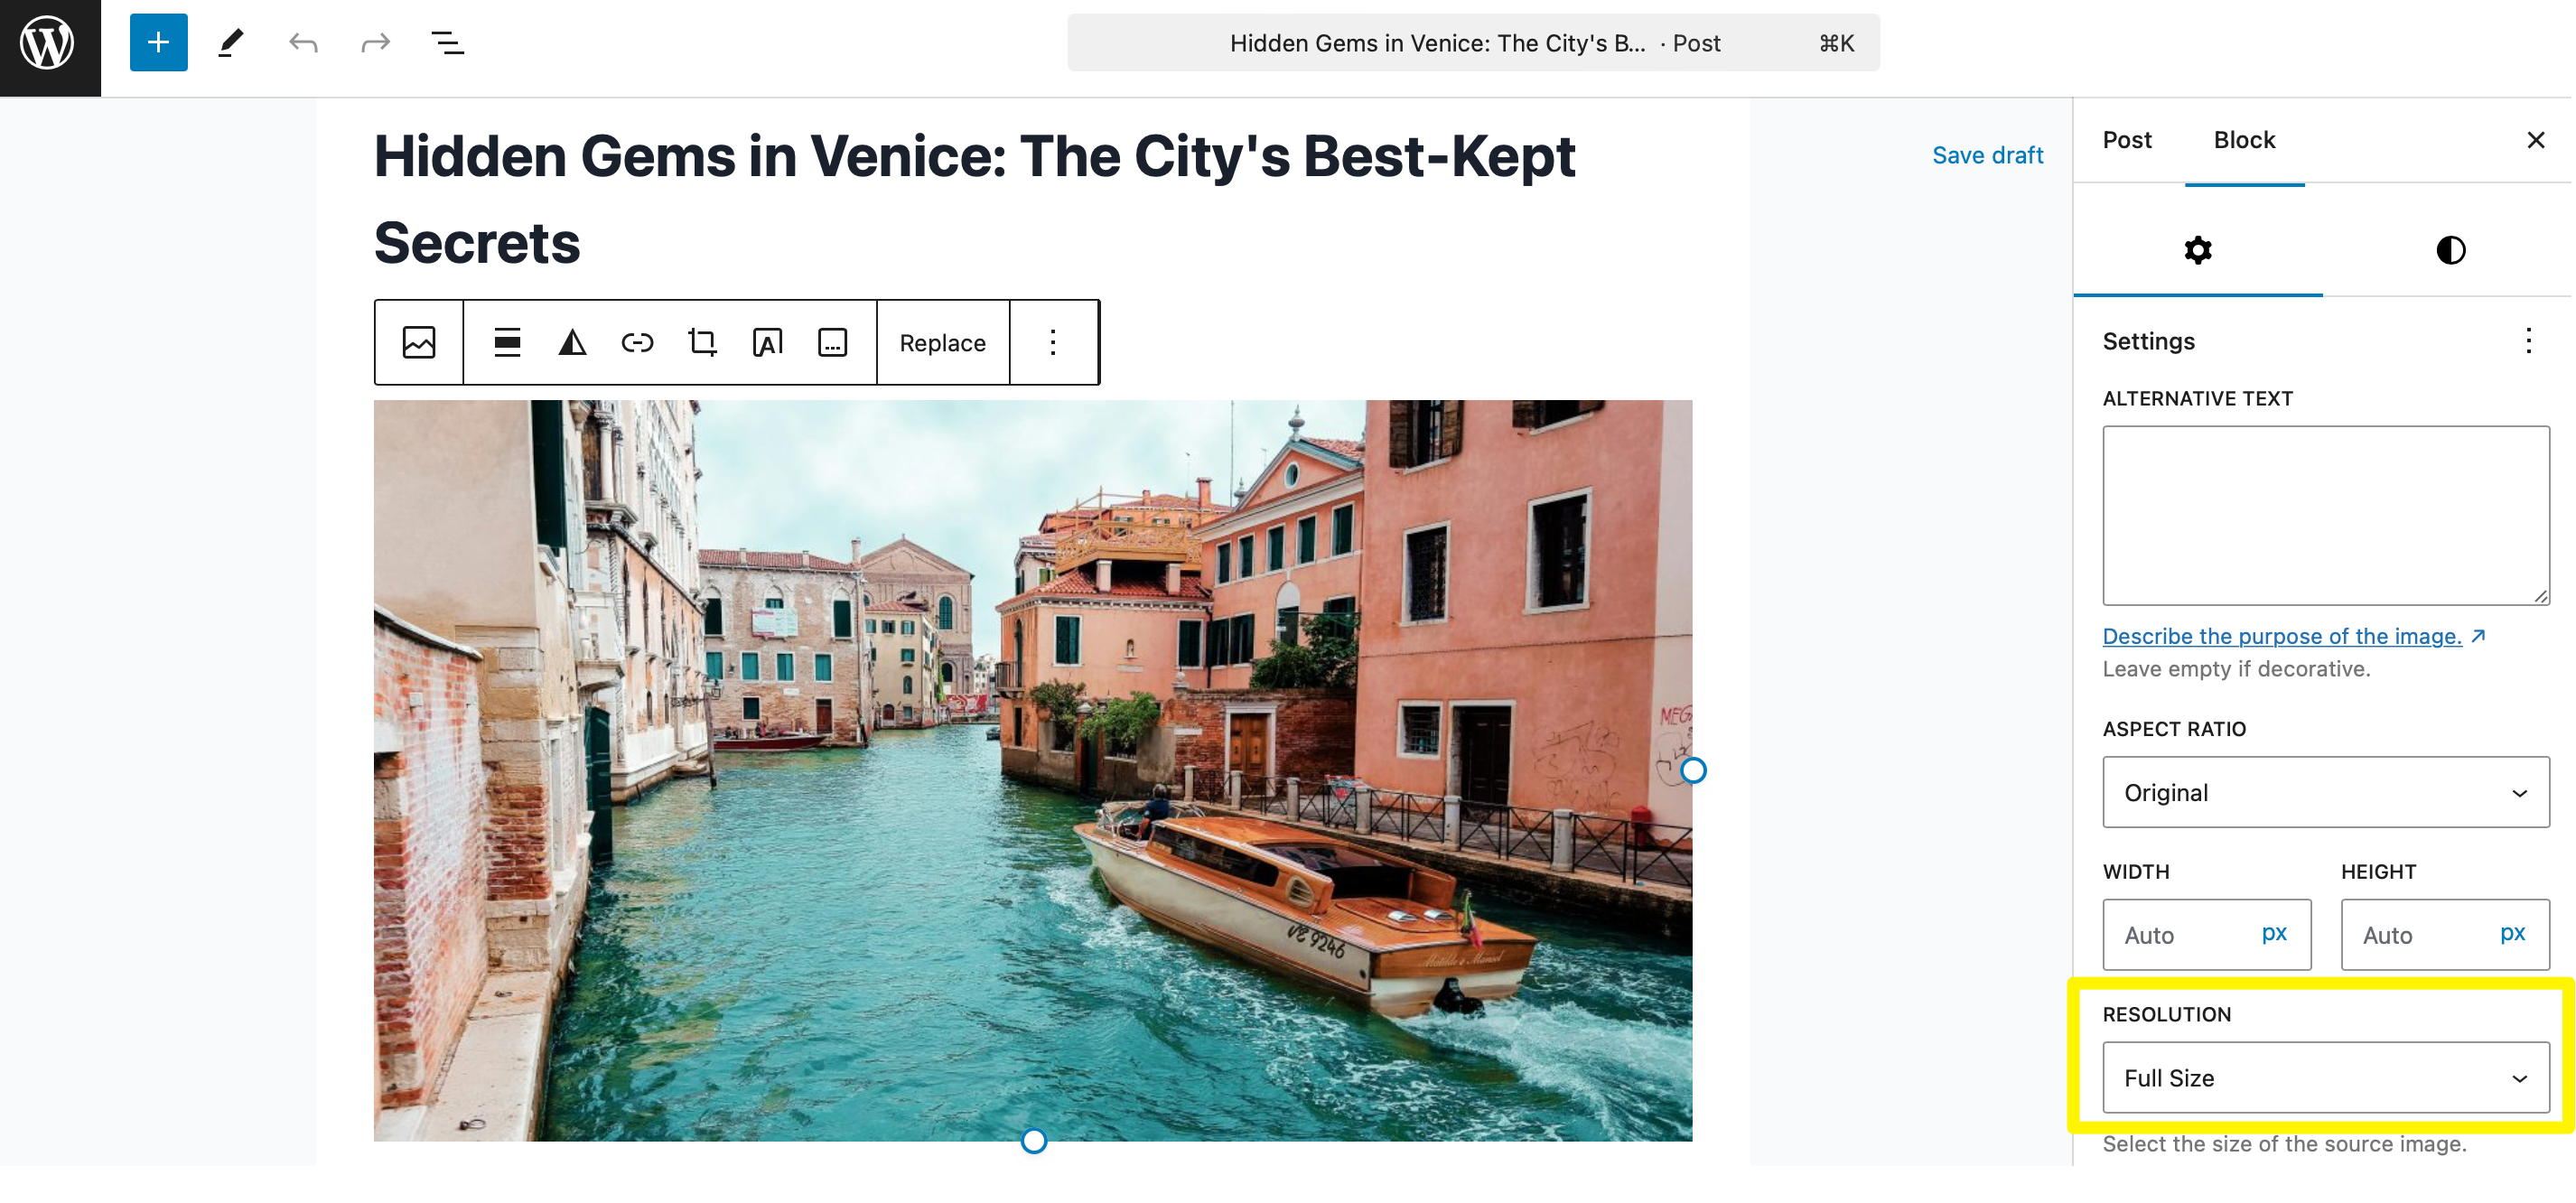
Here, you can choose different image sizes (e.g. thumbnail, medium, large, etc). For example, the original image (full size) preserves the image quality so it creates a crisper picture.
Recommended Image Dimensions for WordPress Images
Although WordPress offers default image sizes, you can crop images to your desired dimensions.
We’ll show you how to do this later. First, here are some recommended image dimensions for common WordPress image locations:
- Blog post images: 1200 x 675 pixels
- Featured images: 1200 x 800 pixels (for rectangular featured images) or 600 x 600 pixels (for square featured images)
- Logo image size: 200 x 100 pixels is a good starting point
- Background images: 1900 x 1080 pixels
- Header or banner images: 1200 x 600 pixels
- Product image sizes: 800 x 800 pixels (smaller for catalogs and galleries)
- Social media image sizes: 1200 x 630 pixels
Note that the image size guide above is just a suggestion. For example, the ideal image sizes depend on the WordPress theme you use.
Additionally, there are nuances when it comes to image location. For instance, we’ve provided a basic social media image size recommendation, but you might prefer a smaller image if you’re sharing photos on a specific platform like Facebook.
The largest image size recommended for WordPress is 1920 x 1080 pixels. This will work for most themes and social media sites, but some parts of the image may get cropped, depending on your layout.
What to Consider When Uploading Images to WordPress
When creating images for WordPress, there are several factors to consider to make sure they look their best. Here’s a breakdown of how to choose images for your WordPress website.
Image Dimensions
As we’ve discussed, you’ll use different dimensions, depending on where you want to display your photo. But why is this important?
Well, if you use images that are too large, it’ll have a negative impact on search engine optimization (SEO) and the UX. That’s because it takes more time for large images to load.
On the other hand, small images can reduce image quality, appearing blurry and/or pixelated. You should check your theme’s documentation to find the recommended dimensions for different sections of your WordPress site (e.g. headers, galleries, etc).
File Size
Large file sizes result in slower loading times, which hinder your search rankings. That’s why many web hosting providers set image file size restrictions.
Typically, this ranges between 4 and 128 MB. However, it’s a good idea to keep file sizes lower than 500 KB (or 1 MB max if the image is displayed prominently on your WordPress website).
Image Format
Image file formats are another factor to consider when creating WordPress images.
Each format has its own advantages and drawbacks, but it’s important to strike the right balance between performance and quality. For example, JPEG is good for images with lots of colors and gradients. It reduces file size (via lossy compression), so you’ll compromise slightly on quality.
On the other hand, PNG is great for graphics, logos, and icons, since it supports transparent backgrounds. It uses lossless compression to preserve image quality, but this results in larger file sizes.
WebP is an excellent alternative since it produces higher-quality images at smaller sizes (compared to JPEG and PNG). However, as a next-gen image format, it isn’t widely supported across all platforms (especially older browsers like Internet Explorer).
3 Best Practices for Resizing and Optimizing Images
By now, you should have a good understanding of different WordPress image sizes and where they work best. So, let’s take a look at some image optimization tips to ensure that your images display correctly.
1. Crop Images to the Correct Size
When you upload very large images, WordPress uses resources (like bandwidth) to resize images automatically. That’s why it’s a good idea to resize images before you upload them.
If you already have images on your site that are too large, you can resize them in the Media Library.
Go to Media > Library from the dashboard. Select the right image and click on Edit Image. Then, choose the Scale option and enter a new custom image size:
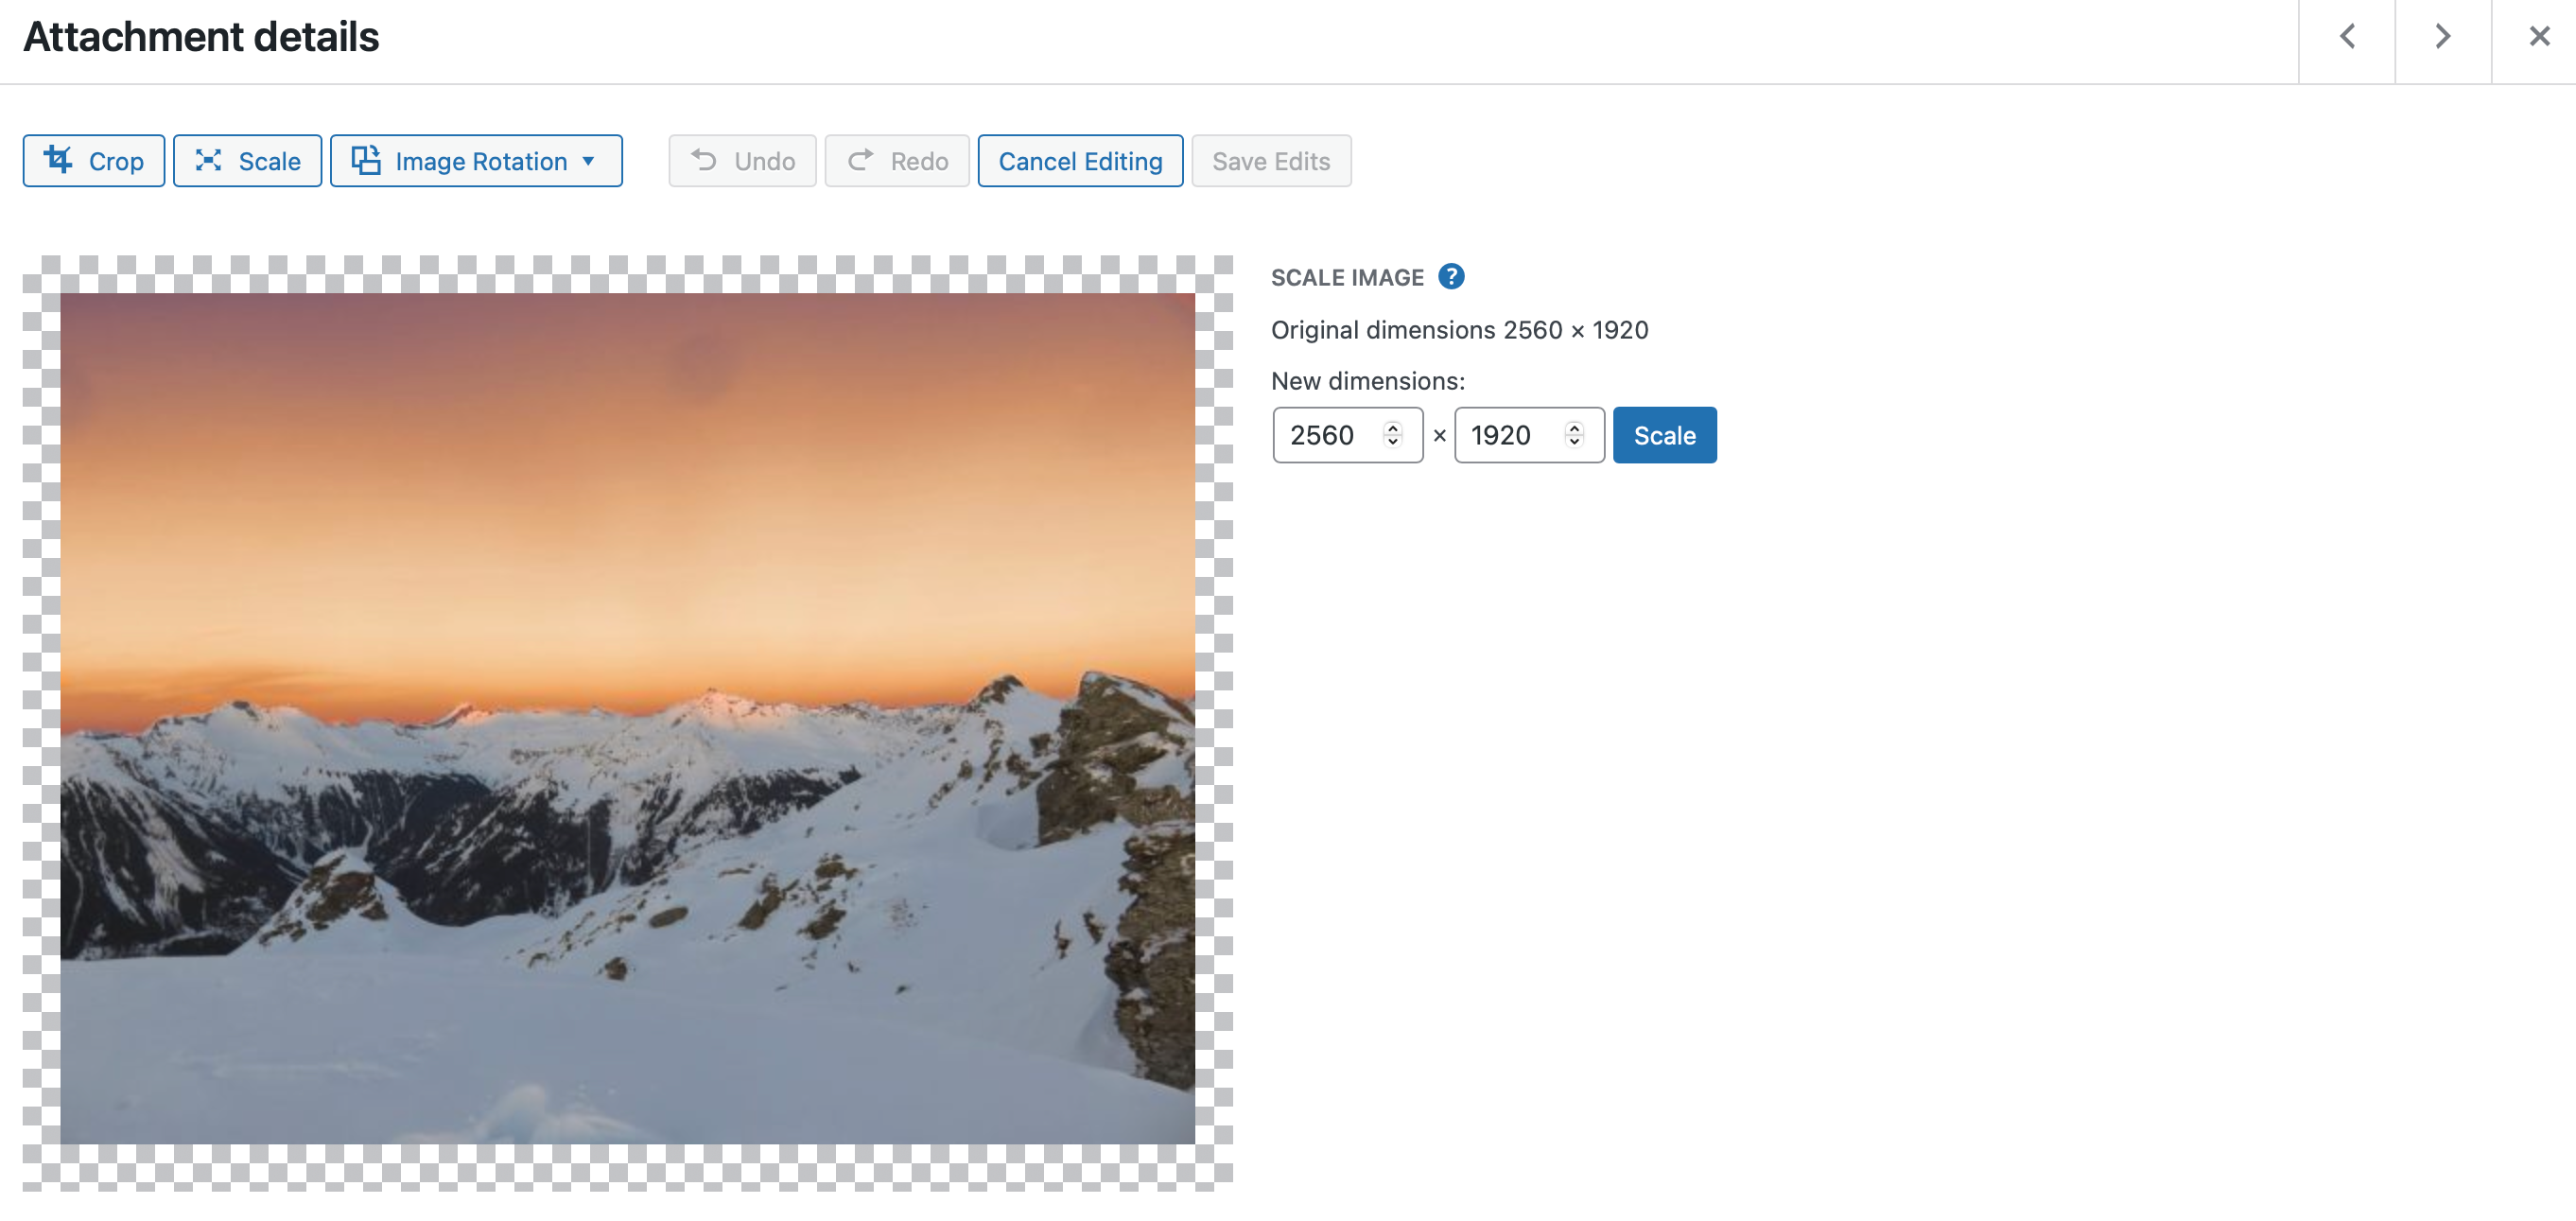
Hit Scale and WordPress will scale the image proportionally. This ensures that the image displays correctly in the location where you intend to use it.
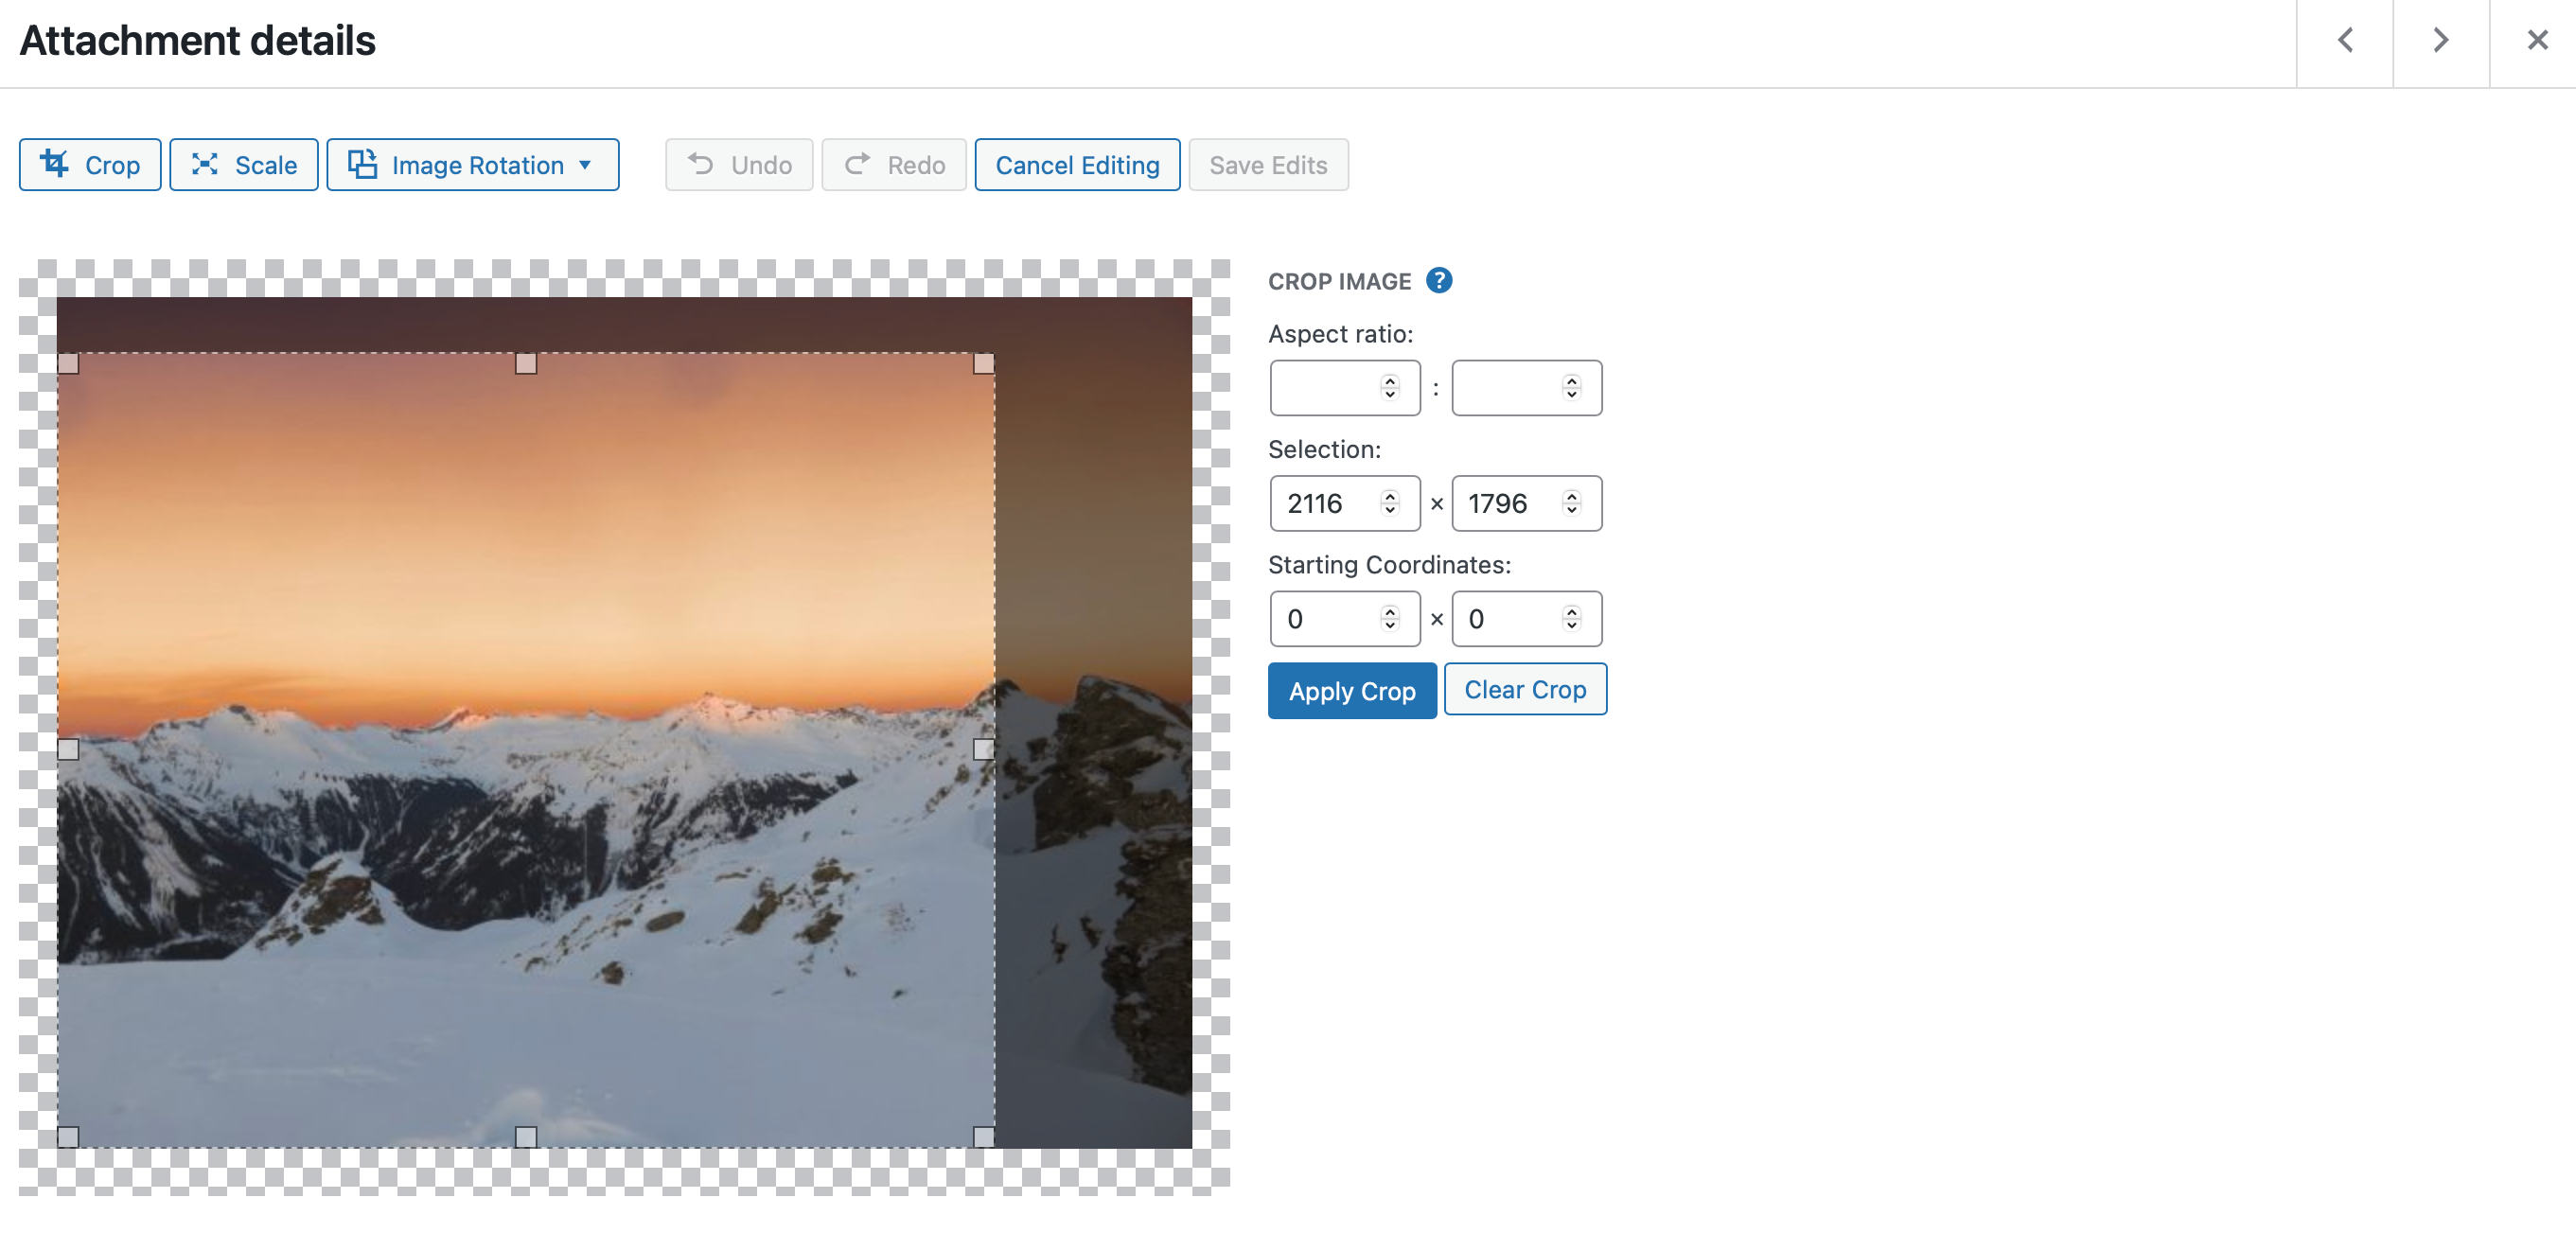
You could also use the Crop feature to reduce the WordPress image size, but this removes parts of the photo:
You might prefer to resize images in the block editor while creating posts and pages. To do so, select the image within the content editor and navigate to the Block settings.
You can use the Aspect Ratio settings to adjust the image size, but this may cut out parts of your image. Instead, enter custom image sizes in the Width and Height fields:
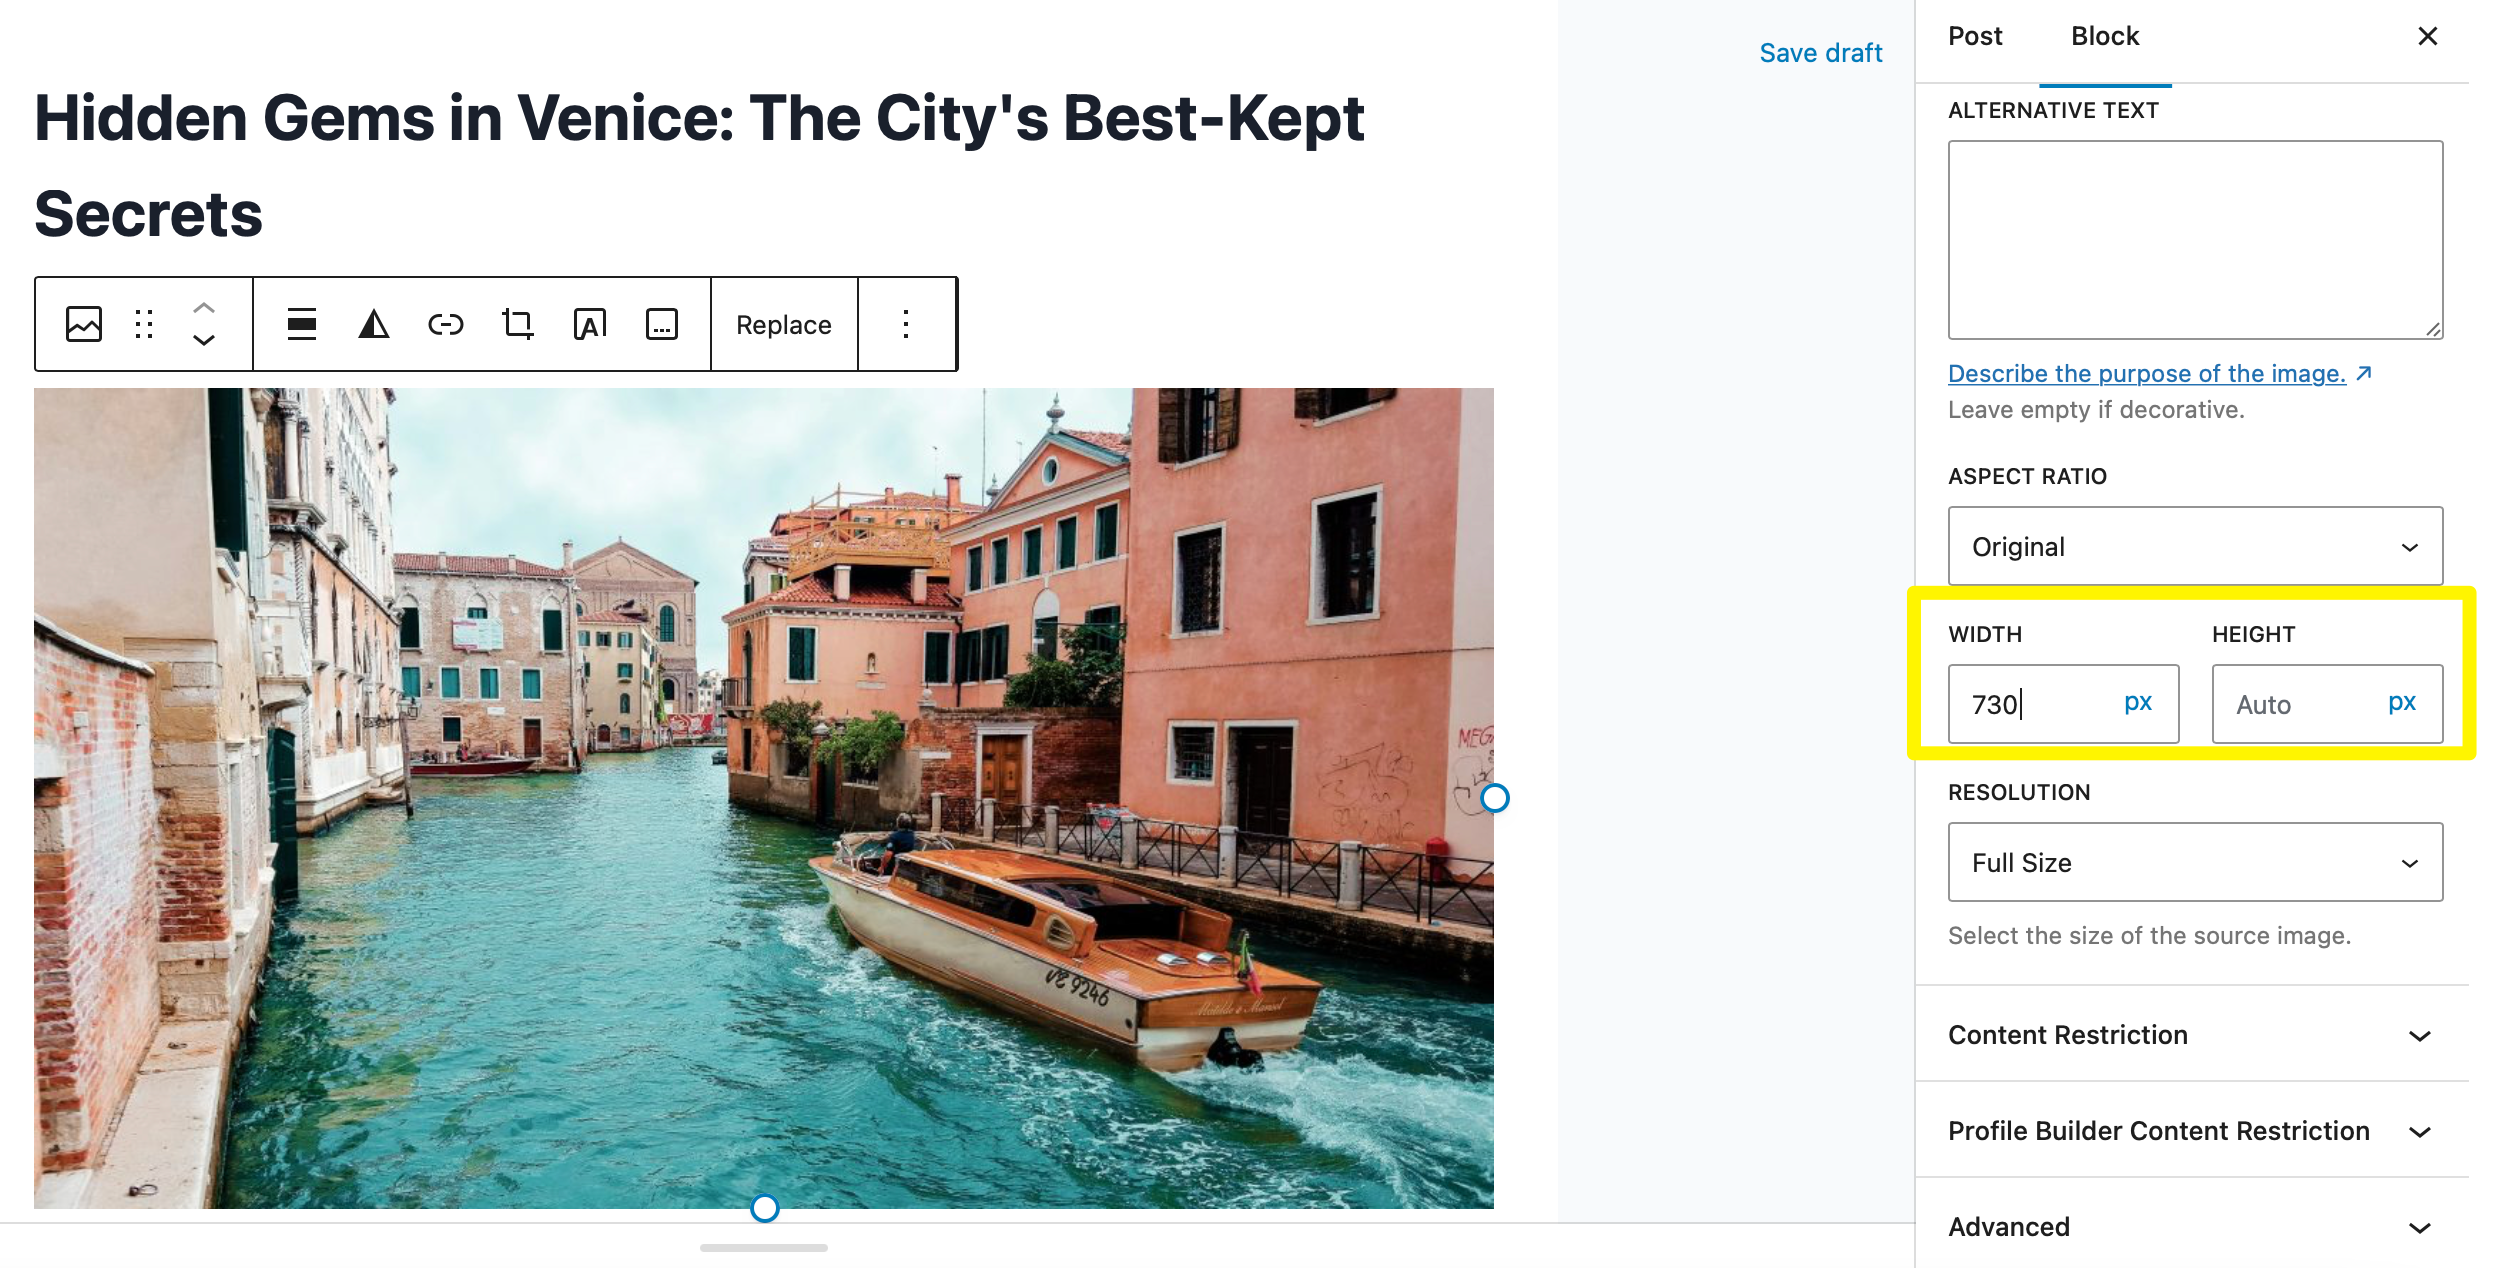
You may also want to use the Crop feature in the WordPress toolbar to adjust WordPress image sizes visually.
2. Compress Images
If you’re looking to reduce the image file size, it’s a good idea to compress your images. This is one of the best ways to accelerate loading times.
As we mentioned earlier, there are two types of image compression:
- Lossy compression reduces the size of media files drastically by eliminating some data. It’s great for web images, but it can result in lower-quality images.
- Lossless compression reduces file size to a smaller degree to prioritize the quality of the image.
There are plenty of online tools that let you compress images, such as TinyPNG. You can also find compression tools available in image editing software like Adobe PhotoShop.
3. Use Image Optimization Plugins
If you want to take image optimization to the next level, you could install a plugin to handle the job for you.
There are plenty of options available including Smush Image Optimization:
This allows you to compress existing images and automatically optimize new images that you upload. You can access other image optimization features, including lazy loading, caching technology, and content delivery networks (CDNs).
Some plugins even auto-convert images into efficient formats like AVIF and WebP.
Conclusion
When you upload a new image, WordPress generates a handful of default image sizes, depending on where they’ll be displayed. However, you can override the WordPress settings and supply custom image sizes that better suit your requirements.
You have the option to resize photos directly in the Media Library or the block editor, but you’ll also want to consider the file size and format to ensure that your images look their best. Plus, it’s important to compress images and/or use an optimization plugin.
Do you have any questions about WordPress image sizes? Let us know in the comments below!

Sophia is a staff writer at WordCandy.co, where she produces quality blog content for WordPress plugin and theme developers, hosting providers, website development and design agencies, and other online businesses.
Leave a Reply