


Linux offers different variations of shell types which can be utilized in terminal. Common shells such as BASH (Bourne Again Shell), ksh (Korn Shell), csh (C Shell), sh (bourne shell), tsch (TC shell) among others are available on linux operating systems.
Ever wonder which shell you are using when accessing a Linux server in terminal? In this article we’ll go over how to find out your current shell.
How to find your current running shell?
To find out which shell you are using while logged into a Linux operating system you can use either of the 3 methods below:
Method #1
First you could run the following echo shell command in the terminal window as your user which will show the current shell in use (which is BASH per the below output):

$ echo "$SHELL"
Alternatively you can run the following echo command to determine the name of the shell in use:

$ echo $0
Method #2
You could also use the following on the command line to determine the currently running shell name:
$ printf "My current shell - %s/n" "$SHELL"
Method #3
The ps command can also be utilized to determine the shell in use per the following command:
$ ps -p $$

As we can see from the above the output indicates we’re using the BASH shell for our user.
How to change your shell in Linux
Usually the BASH shell is default on most Linux distributions and on my Ubuntu server both root and all newly created users are set to run in BASH. But what if we’d like to change the shell for a user?
1. Check for a list of available shells
First lets check to see all the available shells we could choose from by reviewing the /etc/shells file:
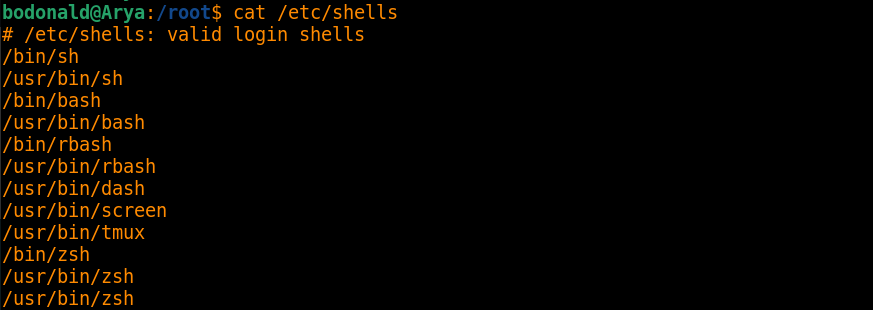
$ cat /etc/shells
2. Change to another shell
For this example lets say we want to change from BASH to zsh for our shell.
To change from the current shell you are using to the zsh shell you can enter in the following command:

$ zsh
Now you may receive the following options and if so just choose option 2 to populate your ~/.zshrc file with the recommended configuration:
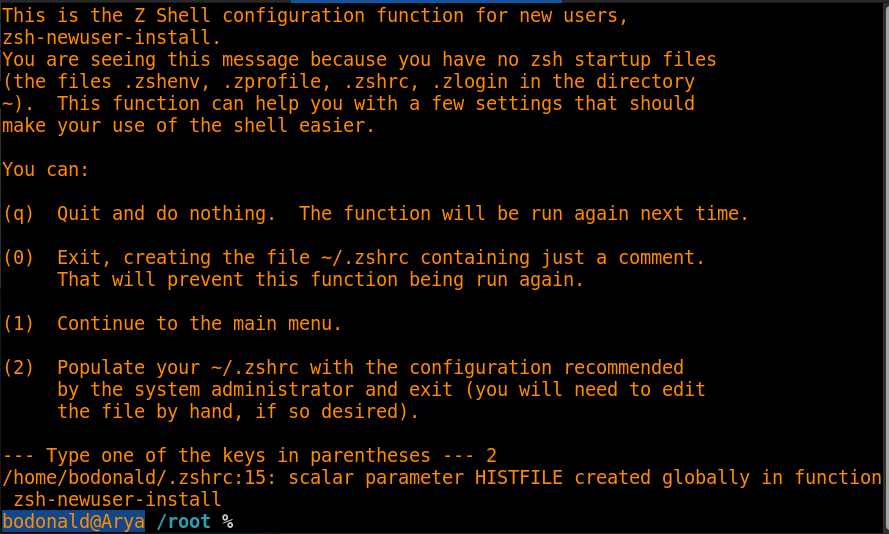
As we see from above we selected option 2 and it created the recommended configuration file then put our user into the zsh shell.
Please note that changing shells in this manner will not be persistent and when you create a new session you will be logged back into whichever shell is default.
In this case my user has BASH setup as their shell so upon creating a new session they would enter back into BASH.
Change the login shell for a user persistently
If you want to change the default login shell for a user and make it persistent there are a couple of different methods.
Each method below involves edits to the /etc/passwd file which contains all of your users and the shell set for them.
Method #1: Edit the shell in /etc/passwd for your user
From the list of available shells in /etc/shells you can update your passwd file for the desired user which will update their default login shell.
In this example I changed the bodonald user’s shell from /bin/bash to /bin/zsh:

Now when we change to that specific user we see the zsh shell is in use upon login from the output:

Method #2: Using the usermod command
As the root user or sudo privileges user you can also utilize the usermod command along with the –shell flag to change the shell for a user persistently.
This command will automatically edit your /etc/passwd file for the desired user to update their default shell.
This can be done with the following command to update a user so that zsh is used as their shell persistently:
$ usermod --shell /bin/zsh bodonald
Method #3: Using chsh
Another method is to use the chsh command with the -s flag on a user to update their default shell.
Like the previous method, this command will automatically edit your /etc/passwd file for the desired user to update the shell used on login.
This can be done as root or a sudo user such as in the following where we change the bodonald user back to BASH as their default shell:
$ chsh -s /bin/bash bodonald
Conclusion
Linux offers many different shells which can be utilized and it is quite easy to change the default shell for a specific user if needed.
In this article we went over how you can not only tell which shell is being used but also how to switch to a different shell within your current session or update the default shell type for a specific user.
Leave a Reply