
When Gutenberg came out, it brought with it, a vastly expanded selection of default content types, we call “blocks”. Previously in the TinyMCE editor, we had buttons at the top, each of which represented a different type of content – headings, lists, and those inserted by plugins. In time though, the developers felt that this was too restrictive, and didn’t accurately represent the way pages are built on the web today.
Gutenberg has a dizzying selection of blocks that we can use. For example, here’s just the starting selection:
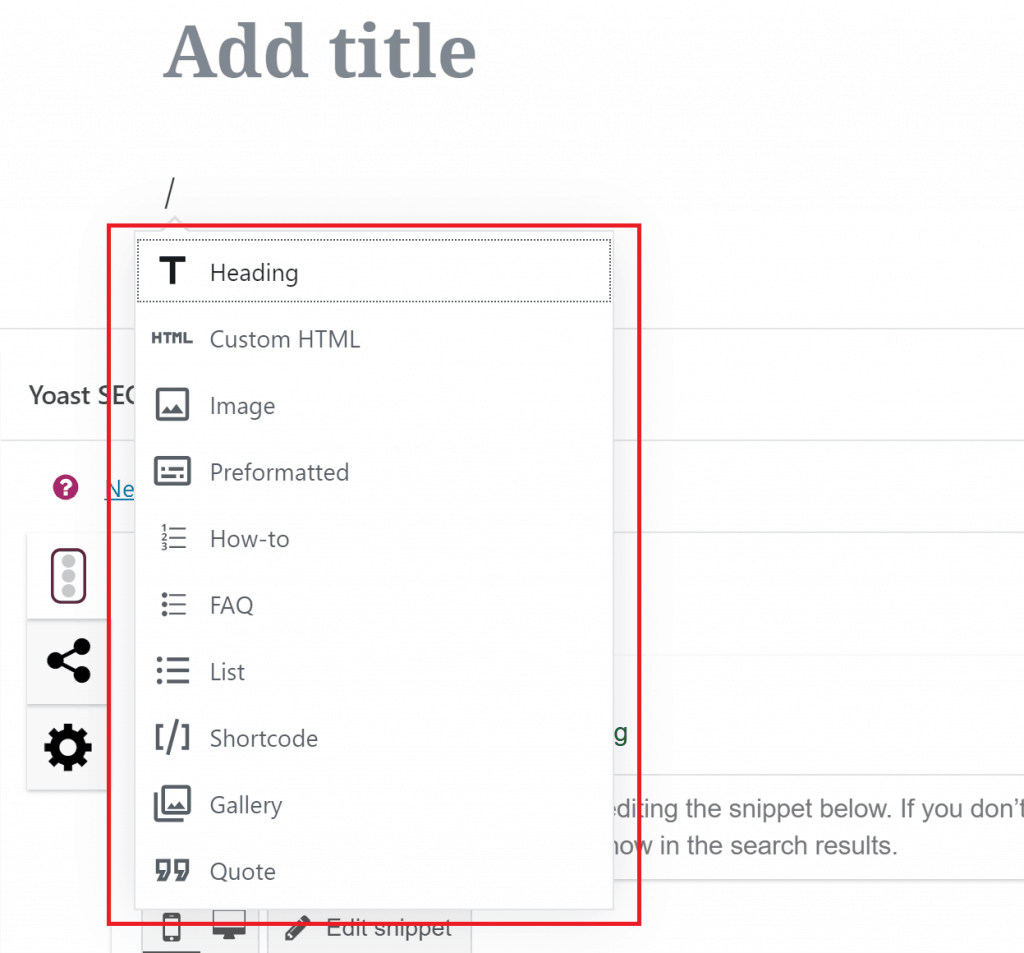
Some of these like the “Heading” block, have sub-choices that allow us to specify the flavor. For example, we can choose h1, h2, or h3 headings. This works great if you’re the sole editor of your website, and know exactly what to use, and what not to.
How to Prevent Accidental Block Usage
However, if you have a bunch of people contributing to your site, you might want to restrict their access to the wide variety of blocks. A simple reason could be to reduce confusion and streamline the editing process. Another could be that you don’t want to reveal too much of the inner workings of your website to 3rd party authors.
Some blocks can expose table names, or other internal codes used on your site that you want to keep private. So it’s perfectly understandable if you need to limit the blocks that are available by default. In the code below, I’ll show you how to create a “safe” list of blocks for your users, and you can customize in on your own.
Limiting the Number of Available Blocks
Let’s say we want to limit the number of available blocks to the following list:
- Images
- Paragraphs
- Headings
- Lists
- Re-usable blocks
To implement this, paste the following code into your functions.php, or the place where you store your custom PHP code. If you’re new to pasting code in WordPress, here’s a tutorial from our knowledge base on how to do just that.
function restrict_blocks( $allowed_blocks, $post ) {
     $allowed_blocks = array(
         'core/block',
         'core/image',
         'core/paragraph',
         'core/heading',
         'core/list'
     );
     return $allowed_blocks;
 }
 add_filter( 'allowed_block_types', 'restrict_blocks');
Once you save your changes and load a new WordPress editing page, you should see the following when you try and insert a new block:
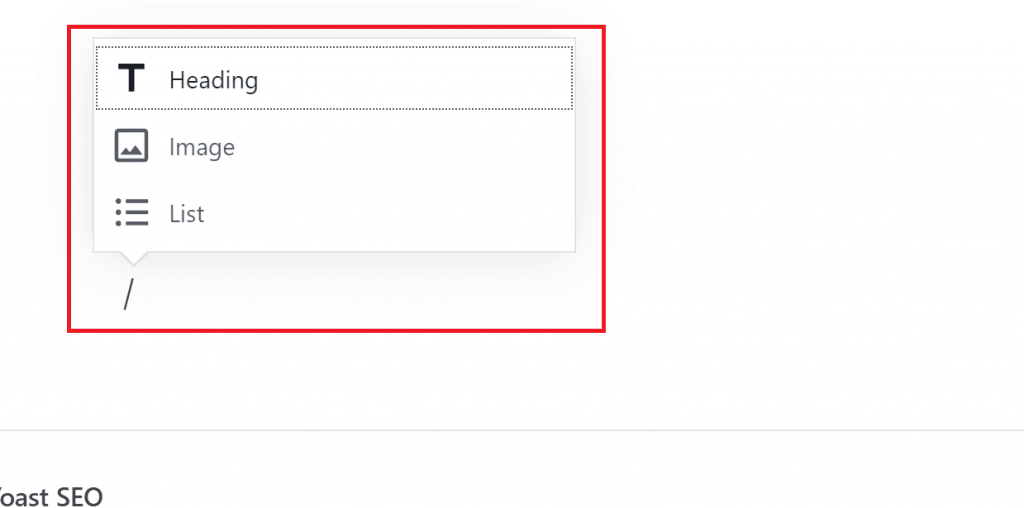
As you can see, the number is greatly restricted. I don’t have any re-usable blocks set up, so it doesn’t show any.
Restricting the Blocks Based on User Role or Page Type
Of course, you don’t want to implement the above code “as is”, since it’ll restrict the blocks for everyone, including yourself. What you want to do, is first check to see if the user is in a particular role. For example, you might want to restrict roles only for Contributors. In which case, the code becomes:
function restrict_blocks( $allowed_blocks, $post ) {
 $user_role = get_queried_object()->roles[0];
 if( in_array( strtolower('Contributor'), $user_role ) )
     $allowed_blocks = array(
         'core/block',
         'core/image',
         'core/paragraph',
         'core/heading',
         'core/list'
     );
     return $allowed_blocks;
 }
 add_filter( 'allowed_block_types', 'restrict_blocks');
You can also filter the blocks based on post types. For example, you may think that regular users who write blog posts don’t need all the fancy block-based bells and whistles, but you might want to keep the option open for pages. In which case you can add another conditional statement like is_page() to get the result you want.
You can expand the above list to further include selected blocks by using this reference list for the default blocks in WordPress 5.0. Based on this, you can make your block selection as comprehensive as you want.
I personally feel that it’s still not as simple as adding or removing functionality in the TinyMCE editor, but it’s a start. Perhaps they’ll add additional functionality to streamline things in the future!

I’m a NameHero team member, and an expert on WordPress and web hosting. I’ve been in this industry since 2008. I’ve also developed apps on Android and have written extensive tutorials on managing Linux servers. You can contact me on my website WP-Tweaks.com!
Leave a Reply